The plastering is done. The walls look smooth. The urge to crack open a tin of paint is completely understandable.
But that smooth, pale surface is deceiving you. Fresh plaster isn’t ready. Not even close. And painting over it too soon is one of the most reliable ways to turn a finished job into an expensive problem.
This isn’t about being overly cautious. It’s about understanding what plaster actually does during the drying process — and why rushing it creates consequences that can’t simply be painted over a second time.
What Fresh Plaster Is Actually Doing
Plaster doesn’t just dry. It cures.
When a plasterer applies a finishing coat of gypsum plaster, a chemical reaction begins. Water in the mix reacts with the gypsum to form calcium sulphate dihydrate — a crystalline structure that gives plaster its hardness and strength. That process takes time. It can’t be forced.
Fresh plaster starts out a deep, rich pink. As it cures, it lightens progressively to a pale, consistent off-white. That colour change is your most reliable visual indicator. Until the entire surface has reached a uniform light colour — with no dark patches remaining — the plaster is not fully dry.
How long does that take? On a standard room with good ventilation and average UK conditions, new gypsum plaster typically takes 4–6 weeks to fully dry. In winter, in poorly ventilated rooms, or in properties with high ambient moisture, that can extend to 8 weeks or more.
Is 4–6 weeks longer than you expected?
What Happens When You Paint Too Soon
The problems that follow premature painting are not random. They are predictable, consistent, and directly linked to the moisture still present in the plaster.
Flaking and peeling. This is the most common outcome. Paint applied over damp plaster doesn’t bond to the surface properly. As the plaster continues to release moisture, it pushes upward through the paint film. The bond breaks. Within weeks — sometimes days — the paint begins to peel away in sheets or flakes. On a freshly decorated room, few things are more disheartening.
Blistering. Moisture trapped beneath the paint film forms bubbles as it tries to escape. These blisters range from barely visible to several centimetres across. They’re not repairable by simply painting over them again. The affected area must be stripped back and the process started correctly.
Mould growth. Paint seals the surface. When moisture is sealed inside plaster that hasn’t finished curing, it creates exactly the warm, damp conditions that mould thrives in. Mould can develop between the plaster and the paint film — invisible until it pushes through, typically as dark spotting along the surface.
Uneven finish. Even if the paint appears to hold initially, damp plaster absorbs paint inconsistently. Some areas drink it in; others resist it. The result is a patchy, uneven sheen that’s difficult to correct without stripping back entirely.
Salt damage. As moisture moves through fresh plaster, it carries dissolved mineral salts toward the surface. If paint has been applied, those salts are trapped. They crystallise beneath the paint film and push it away from the wall — creating white, powdery patches known as efflorescence. This can appear weeks or months after painting, long after the decorator has left the job.
The Mist Coat: Why It Exists and Why It Matters
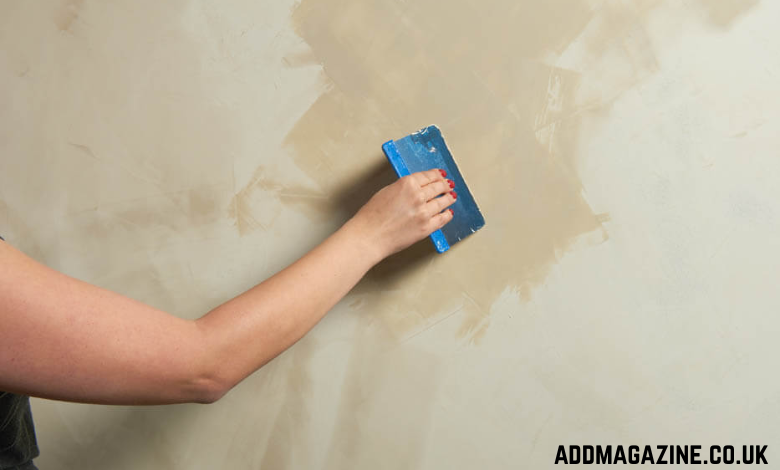
Chris from Point Plastering said “Before any emulsion goes on fresh plaster, a mist coat is essential. This is a heavily diluted first coat — typically a mix of white emulsion and water at a ratio of around 70% paint to 30% water, though some decorators go as far as 50/50 on very fresh plaster”.
The mist coat seeps into the surface rather than sitting on top of it. It stabilises the plaster, reduces suction, and creates a base for subsequent coats to bond to. Without it, even good-quality emulsion applied to fresh plaster will struggle.
Here’s what the mist coat does:
- Seals the surface gradually without trapping moisture
- Allows the plaster to continue releasing moisture through the diluted film
- Reduces the stark variation in suction that causes uneven coverage
- Provides a key for the finishing coats to adhere to
What it doesn’t do is act as a substitute for waiting. A mist coat applied to plaster that’s still actively wet — still showing dark patches — won’t save the job. The plaster needs to reach the right stage before even the mist coat goes on.
Think of the mist coat as the bridge between bare plaster and finished decoration. It’s not the shortcut. It’s part of the correct process.
How to Tell When Plaster Is Ready
The colour test is the starting point, not the finish line. Uniform pale colour across the entire surface is the minimum threshold. But there are other checks worth making.
- Touch test. Run your hand across the surface. Fresh plaster feels cool and slightly damp. Fully dried plaster feels room temperature and completely dry to the touch with no cold spots.
- Moisture meter reading. A basic moisture meter costs around £15–£30 and takes the guesswork out entirely. Readings below 12% moisture content in plaster are generally considered acceptable for decoration. Above that, wait.
- Check the edges and corners first. Moisture lingers longest in corners, behind radiators, and along the base of walls where ventilation is lowest. A wall that looks dry in the middle may still be actively curing at its edges.
- Assess ventilation history. Has the room been heated gently and ventilated consistently since plastering? Or has it been shut up with the heating off? The conditions during curing affect the outcome as much as the time elapsed.
What’s the cost of waiting another week versus the cost of stripping and redecorating an entire room? The answer makes the decision straightforward.
Common Mistakes That Make the Problem Worse
Knowing what not to do matters as much as knowing the correct process.
Cranking up the heat to speed drying. It feels logical. Warm air dries things faster. But blasting a freshly plastered room with high heat causes the surface to dry too quickly relative to the substrate beneath. The outside crust hardens while the interior remains wet. This leads to surface cracking, shrinkage, and a plaster that’s dried but not properly cured.
Sealing windows and doors. Some homeowners close up a room after plastering to keep it warm. Without airflow, the moisture released by the curing plaster has nowhere to go. It sits in the air and reabsorbs into the walls. Gentle, consistent ventilation is what the drying process needs — not a sealed box.
Using vinyl-based paint as a first coat. Vinyl emulsions are not breathable. Applied directly to fresh plaster — even as a diluted mist coat — they can seal the surface before curing is complete. A breathable emulsion, or a purpose-made new plaster sealer, is a better choice for the first coat.
Assuming new plaster is quicker than old. Thicker coats take longer. A plasterer who has had to apply a heavier coat to level a particularly uneven wall has left more moisture in the substrate. The room may need additional drying time compared to a standard skim.
What Happens in Real Terms: A Typical Scenario
Consider a homeowner renovating a bedroom in a 1930s semi-detached in Norwich. The room is plastered on a Friday. By the following weekend — seven days later — the plaster looks pale and the homeowner assumes it’s ready. Two coats of emulsion go on over the weekend.
By week three, blistering appears along the chimney breast. By week six, the paint along the base of one wall is beginning to lift. By month three, dark mould spotting is visible in two corners.
Rectifying the damage means stripping the paint, treating the mould, allowing the plaster to properly dry — which it will now do, several months after plastering — and redecorating from scratch. The cost of the additional materials and labour easily reaches £200–£400 for a single bedroom. The disruption is significantly worse than simply waiting the recommended time in the first place.
Replastered Patches Versus Full Rooms
Replastered patches — where a section of damaged plaster has been cut out and made good — carry an additional risk. The new patch is surrounded by old, dry plaster and existing decoration. It can be tempting to blend it in quickly.
But the patch dries at its own pace. Its edges butt up against sealed, painted surfaces that restrict moisture movement. Small patches in poorly ventilated spots — behind furniture, in corners, near the floor — can take as long to dry as a full wall.
Painting over a small patch too soon produces the same problems as painting a full room prematurely. The scale is smaller. The frustration is identical.
Giving Plaster the Time It Needs
New plaster is not a surface. It’s a process. The wall you see after a plasterer packs up their tools is not the wall you’ll have in six weeks’ time. The chemistry hasn’t finished. The structure hasn’t fully formed.
Every week spent waiting is a week of proper curing. Every day saved by painting early is a risk carried forward into the finished decoration.
The right sequence is straightforward:
- Wait for uniform pale colour across the entire surface
- Confirm dryness with a moisture meter where possible
- Apply a diluted mist coat of breathable emulsion
- Allow the mist coat to dry fully before applying finishing coats
- Use two finishing coats, allowing each to dry between applications
Decoration applied to properly cured plaster lasts. It bonds cleanly, covers evenly, and holds its finish for years. That’s the outcome worth waiting for.